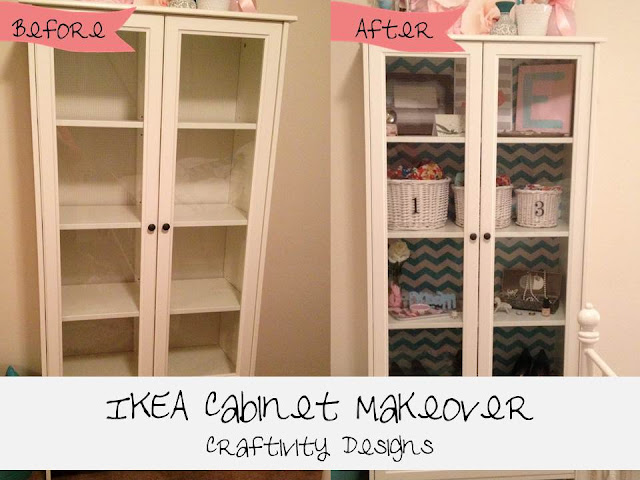
Materials: IKEA Cabinet (no longer sold), Chevron Shelf Paper, Tape Measure or Ribbon, Scissors
Description: One of my favorite IKEA pieces in my home is this white cabinet (no longer available at IKEA) in my bedroom. Since the walls in my room are an off-white, the cabinet tends to blend in so I wanted to add something to make it POP! I decided that I would add chevron shelf paper to the back of the cabinet.
I started this project by measuring the back of the cabinet. I couldn't find my tape measure so I ended up using a piece of ribbon (also from IKEA) to measure the distance and measured the paper using the grid on the back. Before applying the paper to the back of the cabinet, I removed all of the wooden shelves.
When I started peeling the backing off of the shelf paper, I pulled too much off at once and it was a big sticky mess! After finishing the first section, I started only peeling off a small amount of the backing away from the top while smoothing the paper onto the cabinet.
I continued this process of measuring and applying the shelf paper until the entire back of the cabinet was covered.
The best part about this project? It was cheap and simple! I spent $4 on a 2-pack of shelf paper (I still have a whole roll left) and the project was complete in less than an hour.
What I love about using shelf paper on my IKEA furniture is that it's easily removable so when I get tired of chevron, I can take it off and start all over again!
See more of the IKEA cabinet with shelf paper backing.
~ Erica, Kentucky


Post A Comment:
0 comments:
Post a Comment